


 About Us
 2023-08-05
2.3 Light glass installation
1) Installation process
The installation of high insulation hidden frame glass light roof, due to its wind pressure resistance, water tightness, air tightness, thermal engineering, sound insulation and lighting requirements are much higher than the general engineering light roof, and also different from the hidden frame glass project, in order to ensure the accuracy and quality of installation, effective process innovation, the use of compartment axis measurement with the main structure measurement, components and components are installed on site in several times, digestion measurement deviation, timely inspection and review the installation quality and correct it several times in time. The flatness and slope of the glass surface are controlled on site. The process flow is as follows: secondary intelligent layout design of lighted glass → measurement and placement → installation of glass aluminum frame → lighted glass splicing correction installation technology → glue injection → cleaning. The basic order of installation is from top to bottom, from the center to both sides.
2) Measuring and placing lines
Measure and place the line when first positioning, then measure the steel structure deviation, after measurement to determine the installation baseline, each glass installation longitudinal and transverse control lines marked out on the keel, and the installation surface of each side marked out.
3) Aluminum frame installation
When installing the aluminum frame, press the aluminum frame strip with aluminum pressure bar onto the curtain wall skeleton according to the measured installation line, and then connect it with the horizontal and vertical keel with screws, as shown in Figure 4, and enter the next process after repeated checking.
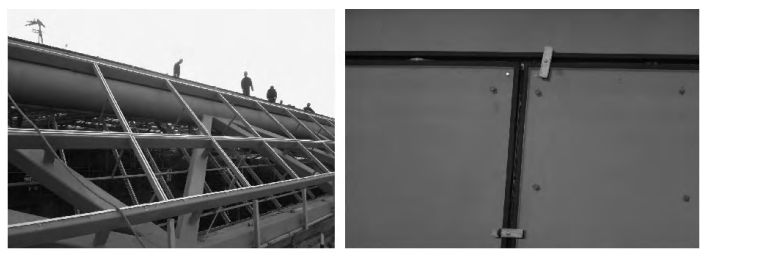
Figure 4 Installing the aluminum frame
4) Light glass installation
According to the requirements of the length of the light glass material and the spacing, use CAD software to calibrate and correct the data of the light roof and then install the glass. Installation using positioning fixture, according to the intended glass and aluminum frame design position, the double-sided adhesive tape on the aluminum frame, so that the glass along the baffle fall to the two datum line overlap. Glass to achieve a successful positioning, can not move the glass when the positioning is not allowed, because once the glass and double-sided adhesive tape contact, sticky adhesive on the glass, in this layer of adhesive coated with structural adhesive can not ensure that it is firmly bonded to the glass. Glass positioning after the formation of the glass and aluminum frame as the sidewall, pad strip for the bottom of the hollow, its size should be the same size as the width and thickness of the glue seam.
(5) glue injection
Glue injection is the last process in the construction, but also to ensure the quality of the project, so that the project to achieve the performance indicators of the key. Check the distance and flatness between the outer trim panel blocks, and after confirming it is correct, fill in the joints with foam strips matching the width of the joints, and ensure that the connection and depth is consistent to ensure that the thickness of the glue surface is uniform and reliable. Paste ≥25mm width of protective tape on both sides of the joint finish to prevent the sealant from sticking to the exterior finish causing pollution and affecting the appearance effect. Wipe the surface of the glue seam with alcohol to remove other debris such as dust to ensure a clean and pollution-free surface to prevent the sealant from sticking firmly and affecting the sealant effect. Before injecting the glue, the compatibility test between the sealant and the finish material should be done, and the surface of the injected sealant should be trimmed with a scraper or other glue repair tools to ensure that the surface of the glue joint is smooth, flat and even. Structure silicone sealant, weathering silicone sealant and wall adhesive before injection, the injection site must do a good job of purification, should be first aluminum frame, glass or seam on the dust, oil stains, loose material and other dirt clean, after injection should be embedded dense, smooth surface, strengthen maintenance, prevent hand touch, water, etc. The effect of the completed light roof is shown in Figure 5.
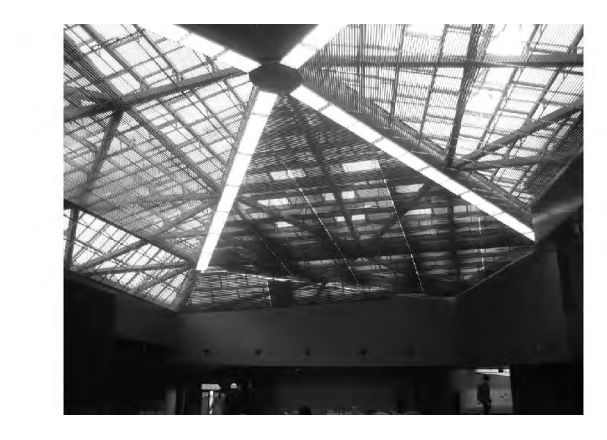
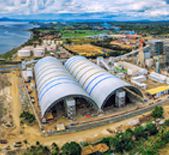
Figure 5 Finished effect of lighting roof
More and more large public buildings with high insulation glass daylighting roof, how to ensure its installation accuracy is the primary task in the construction, which relates to the waterproof, drainage, lighting and shading functions and thermal insulation functions of this kind of large public roof, but also to ensure the air tightness, deformation, ventilation and cold bridge (or hot bridge) and other functions. The construction technology in this project can effectively ensure that the glass installation precision is controlled in the order of mm, ensuring the insulation performance of high insulation and lighting roof, constant humidity, low energy consumption, the structure has been running so far, its energy saving and environmental benefits are remarkable. The technique has guiding significance for the construction of similar lighting roof.


