


 About Us
 2023-09-04
(3)The following is an example of a unit to introduce the bulk installation of the space frame.
1)Install the support body between the first span in position, the center line of the support body should coincide with the center axis of the foundation, and use a level to align the elevation.
2)Install the lower chord ball and rod of the first span, form a longitudinal space and choose a good pivot point under this space to ensure the parallelism of the lower chord ball.
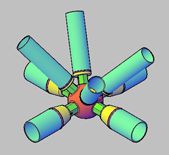
3)Install the first unit of the belly rod and the upper chord ball, with the corresponding ball a chord rod two belly rod assembled into the lower chord and lower chord triangular cone, the triangular cone and the first unit in turn, so that it forms a rigid whole after adjusting the installed space with a steel ruler, level meter and other tools (to adjust the position of the support and temporary pivot point position and elevation) to determine the qualified before continuing to assemble.
4) Installation of upper chord inverted triangular cone space. space from the second unit using continuous installation and assembly, from the side span to first install a ball a top chord two belly rod triangle cone later for a ball in the top chord two belly rod quadrangular cone, installation will be two oblique belly rod support in the lower chord ball, in the upper tension on the top chord rod gradually close to the installed top chord ball (i.e., push cone) with a moving hand tight into, and then the oblique rod screwed into the lower chord ball hole and evenly tightened (tightening should pay attention to the order to prevent (Uneven force to prevent the upper chord ball bolt jammed) according to the above process to continue to install gradually.
5)Install the lower chord orthotriangular cone space. After installing the inverted triangular cone space, the space will start to install the positive triangular cone space, which can be installed using the bulk method and push cone method respectively. Install one side of the diagonal belly rod, single rod in place screwed into the sagittal height of the convenient control space, continue to install the other side of the diagonal belly rod, both sides screwed into the lower chord ball, complete a set of positive triangular cone space, gradually draw the other side of the installation until the support, each completed a positive triangular cone and then installed should check whether the size of the upper chord quadrilateral space is correct, found that the error gradually high speed after tightening the bolt (positive triangular cone space installation, remember that attention should be paid at all times) (temporary bearing point of the support situation, there should be timely adjustment when the strain).
(4) Adjustment and fastening. Bulk method to install the space frame, should always measure and check the quality of the space frame. Check the size and diagonal of the lower chord space, check the size and diagonal of the upper chord space, check the longitudinal length, transverse length and space vector height of the space. Each temporary support point can also be adjusted before it is removed. Check the overall deflection of the space frame, the deflection value can be controlled by the adjustment of the upper and lower chord dimensions. The deflection measurement method is: the designer provides the deflection value, and the field technician measures it with a total station, or calculates it with steel ruler and plumb line measurement. The net frame should check the sinking of each temporary support point at any time during the installation process, and if there is a decline, it should be reinforced in time to prevent the phenomenon of falling. After the inspection and adjustment of the net frame, the high strength bolts of the net frame should be re-tightened. After tightening the high-strength bolts of the space, the positioning small bolts on the sleeve should be tightened and locked.
3.2.2 Sliding equipment configuration
The project is equipped with 12 sets of TLPG-1000 hydraulic crawlers (horizontal jacking capacity of 100 tons) in each district, each sliding area weighs about 2000 tons, considering the friction coefficient of 0.2, the required horizontal thrust is 2000×0.2=400 tons < The total pushing capacity of crawler top is 1200 tons, which meets the requirements; a total of 4 sets of TL-HPS-60 hydraulic pumping stations, each pumping station drives The hydraulic pumping stations are arranged in the four axes of A/B/C/D, 38-39 axes and zero-meter layer area, and the pipelines are arranged against the axes.
3.2.3 Sliding of the space
(1) Preparation before sliding.
1) Sliding support, hydraulic crawler and hydraulic pumping station and other cranes are installed in place;
2)Connect the oil pipe between the pump station and the crawler, and check and confirm after connection;
3)Connection, rechecking and confirmation of power lines, control lines and sensors, etc;
4)Due to transportation, the joints of individual valves or hard pipes on the pump station may be loose, which should be checked one by one and tightened, and the pressure regulating spring of the relief valve should be checked to see if it is completely in a relaxed state;
5)Manually operate the corresponding button in the control cabinet without starting the pumping station, check whether the action of the solenoid valve and shut-off valve is normal and whether the shut-off valve number and the slider number correspond;
6)Power up the system and calibrate the direction of hydraulic pump spindle rotation;
7)Check whether the oil pipe connection of A and B chambers of the crawler is correct; check whether the shut-off valve can cut off the corresponding cylinder; check whether the proportional valve can speed up or slow down the expansion speed of the corresponding cylinder when the current changes.
8)Check the padding and pressure plate compression between the sliding track and the sliding tire frame, and adjust them in time;
9)check the crawler clamping device and track fixing situation, to ensure clamping;
10)grind the track smoothly and apply grease to reduce the friction coefficient;
11)Clear the obstacle beside the track.
(2) Control points in the sliding process
1)After all the preparation work is done, and after a systematic and comprehensive inspection, the site skidding operation commander-in-chief will check and issue an order before the official skidding operation is carried out.
2)In the process of hydraulic sliding, pay attention to the observation of the pressure of the equipment system, load changes, etc., and carefully do the record work.
3)In the sliding process, the measuring personnel should measure the accurate value of the displacement of each traction point through the steel tape measure in cooperation with the laser rangefinder measurement data, and compound with the laser rangefinder measurement data to assist in monitoring the synchronization of the sliding process of the sliding unit.
4)The working status of the sliding track, hydraulic thruster, hydraulic pump source system, computer control system, sensing detection system, etc. should be paid close attention during the sliding process.
5)Before using the site wireless intercom, it must be declared to the engineering command, and the role can be played only after a clear reply. Communication tools are kept by a dedicated person to ensure smooth signal flow.
6)If the steel structure deviates from the sliding direction during the sliding process, it needs to be corrected. The method of correction is to make the steel structure return to the sliding position during the sliding process by controlling the jacking speed of each crawler.
(3) Trial sliding stage
After the installation of the steel structure of one skidding unit (113m) is completed, no abnormalities are checked and the commissioning of the electrical system is completed, the skidding operation is carried out. Firstly, adjust the corresponding pumping station pressure for 40% loading, and start sliding until the crawler cylinders at all jacking points cannot be pushed, check if there is any abnormality, and after confirming that there is no error, continue to load 60%, 80%, 90% and 100% of the theoretical value. If there are individual points that cannot be moved, after checking and confirming that all tire frame constraints are lifted, it is necessary to confirm whether to load further until all thrust points are moved. After all the sliding shoes (supports) start to slide, suspend the sliding, and check the normal operation of each equipment comprehensively: such as the sliding amount of the sliding supports, whether the sliding shoe stopper is stuck, the crawler clamping device, the change of the force of the sliding track and the original structure, etc. After confirming everything is normal, continue the sliding construction.
(4) Formal skidding stage
When everything is normal in the trial sliding stage, start to formally promote sliding. During the whole sliding process, it should be checked at any time that:
1)The steel structure has a large span and a long slip distance. When sliding, review the synchronization of the sliding of each pedestal by measuring the scale marked on both sides of each track in advance at any time;
2)Tracking to check the slide shoe stopper and track jamming condition;
3)Tracking to check the crawler clamping device and track clamping condition;
4)Tracking and measuring the slip of the main propulsion support and the propelled support;
5)tracking to check the connection between the track and the track embedment; ⑤ tracking to check the connection between the track and the track embedment;
6)Ensure that the track pressure plate should be pressed against the track during the sliding process;
7)Ensure that the obstacles beside the track are cleared at any time.
(5) Sliding in position
When the overall synchronous sliding is 200mm away from the in-situ point, reduce the sliding speed, cooperate with the measuring personnel to measure the relative distance of all sliding points (relative to the in-situ position), and then determine the corresponding control parameters according to the posture of the structure, the general principle is to accelerate the sliding speed of the points with large relative distance, and slow down the sliding speed of the points with small relative distance, so that the whole steel structure gradually approaches the in-situ displacement in the dynamic process. In the dynamic process, the whole steel structure will gradually approach the displacement in place. Since the difference of sliding distance of the whole sliding process is controlled within 10mm, the difference of speed adjustment of each point is not too big. Continue the overall sliding until the difference of 15mm from the in-situ position is suspended, and again cooperate with the measurement personnel to measure the relative distance of all the sliding points, and then adjust the sliding speed of the corresponding sliding points in groups according to the measurement results, and take the control mode of first to the in-situ point cut-off for individual adjustment until all the sliding points reach the required value.
(6) Slip speed and acceleration. The speed of the sliding system depends on the flow rate of the pumping station and the time occupied by other auxiliary work, and the sliding speed in this project is about 8-10m/h. Since the speed of hydraulic crawling is very slow, the acceleration is almost zero, and there will be no impact and vibration on the components. 3.2.4 Unloading after sliding in place The span of the space in this project reaches 113m×39m, so as to avoid the unloading process, the difference in the height of the supports and To avoid the deformation of the space structure caused by the difference in the height of the support during unloading, the space support is divided into two parts during the preliminary design, for example, if the height of the support is 400mm, it is divided into upper 200mm and lower 200mm, the upper part is rested on the sliding rail to participate in the space sliding, and the lower part, after the space sliding is in place, the rail is withdrawn and the lower part of the support is inserted, the upper and lower parts of the support are connected into a whole by high strength bolts, and then the support is welded Then the support will be welded to the top surface of the pre-buried parts. Then the support is welded and fixed to the top surface of the pre-built parts. The unloading of the net frame is completed.
4 、Main features of the system
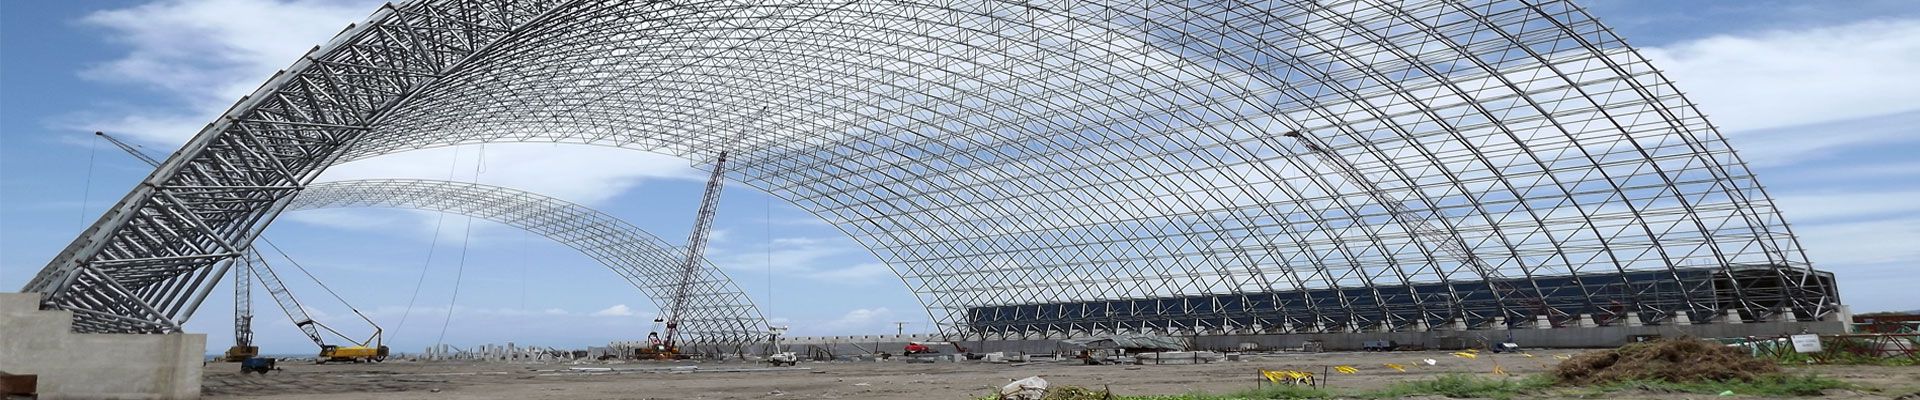
(1)High-altitude bulk loading adopts the form of steel structure tire frame platform, which cancels the traditional full-frame erection method and reduces the cost of scaffolding erection and maintenance. Secondly, all the vertebrae assembling are worked on the tire frame platform except for the small range of rod assembling on the ground, and the flat and stable tire frame platform is like ground work, which greatly reduces the risk of hundreds of people working at high altitude.
(2)Tire frame platform structure body type similar to the column, beam, column support and other components of the portal steel frame system, occupy little space does not affect the site, and not the normal operation of the coalfield equipment.
(3)The use of technically reliable hydraulic sliding equipment, hydraulic control system synchronization, space frame sliding using triple span synchronization, greatly improving the efficiency of the sliding construction, and the acceleration during the hydraulic crawl in the sliding process is almost zero, no impact and vibration on the components.


